Overview
This is a quick breakdown of key features and decisions made during the few days I worked on this personal project. Goals for this project were to create the best engine audio possible with free samples, setup turbo audio behaviour and suspension impacts. A key goal for this project as a whole was to test the quality of work I would be able to produce with limited resources and time. Below is a short demo video showcasing the end result:
Engine audio design
The first and honestly primary challenge of designing vehicle engine audio was finding samples that were: free, high quality and had a wide enough variety of consistent RPM recordings. I ended up settling with a set of recordings from a Mazda Miata MX5, which included steady RPM’s from 0k to 7k, with 1k increments. Although multiple mic perspectives were provided. Although I planned to have spatialised events for both the engine and, exhaust, I ended up just using the exhaust recordings, as these had a darker tonality that made creating seamless transitions between loops much easier between the large gaps in RPM (time was also a factor).
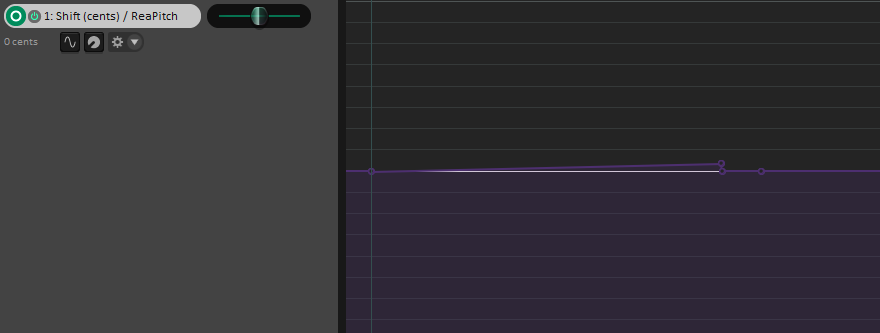
To create the RPM loops, I used the standard process of finding a loop-able section, splitting a small beginning portion at a zero phase point and moving to the end to cross-fade at a point of similar phase. Then, making small adjustments to both pitch and tonality to eliminate resonances and pitch fluctuations.
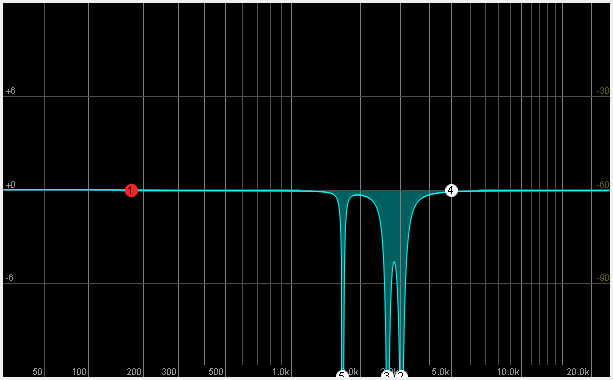
Here are some before and after clips of the same RPM loop, with and without EQ.
After this process, the loops were further cleaned up in iZotope RX to remove any clicks, weird tones or background noises present in the recordings, then compressed and saturated for a bit of flavour.
In Wwise, the engine loops were arranged in a blend container, individually pitch mapped along an RPM RTPC, and then cross-faded together to create as smooth and consistent transitions as possible. After fading, the loops were further pitch tweaked in descending order to fine tune their placement.
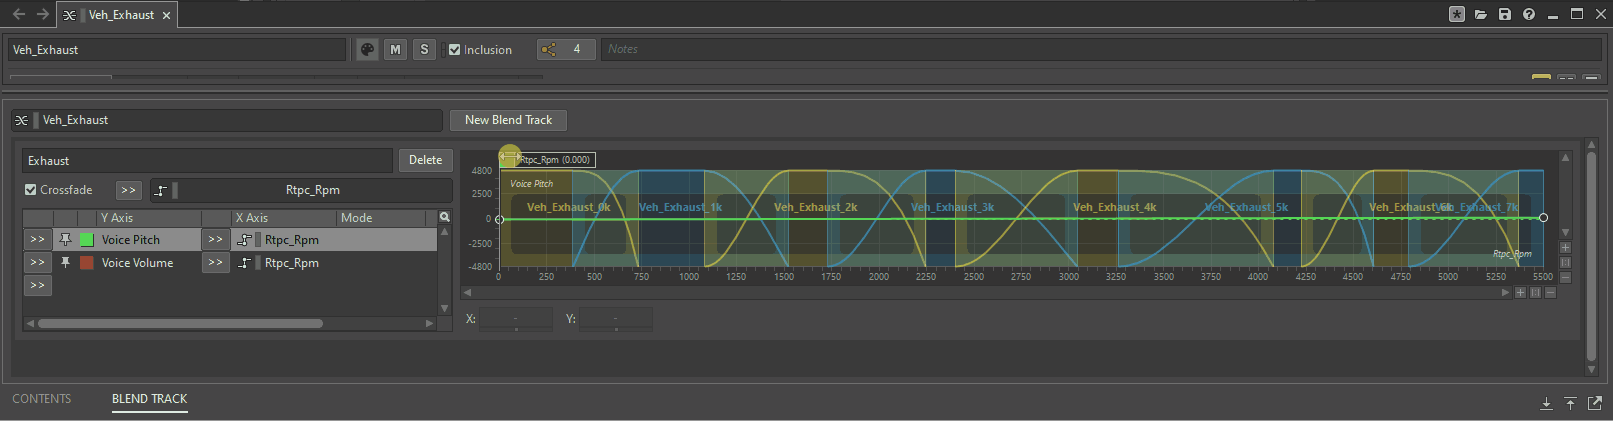
Unfortunately, this set of Mazda recordings did not come with any variations for off-load or neutral load throttle levels. To simulate this behaviour, I automated the volume, filtering and distortion levels of the blend container using Wwise’s runtime effects, to create a distinction between the intensity of the throttle input.
Turbo audio behaviour
Approaching this, I did a bit of research into the relationship between throttle and the turbo flutter phenomenon. As the gear shifting in this UE car demo was automatic, I had to come up with some parameters for determining when an appropriate time for turbo flutter / blow-off valve audio to play, using just Load and RPM RTPC’s.
The solution I came up with was to run several checks at runtime to determine whether the throttle had been released, or the car was shifting gear. To prevent this system from constantly triggering after every throttle release or rapid gear shift, I implemented a timer that scaled with the current throttle input. At maximum load (1), this timer would count to 3.0f (seconds) to simulate a period for air pressure to build up within the compressor, lower load values (say 0.5) would decrease the rate at which this timer incremented, preventing the blow-off audio from triggering after 3 seconds of a low throttle amount.
In addition to the blow off sound, a sustained air pressure layer is constantly playing, with its volume and pitch tied to both RPM and Load. As RPM increases, the volume and pitch of the sustain increases, creating the pressure build up for the “blow-off”. This was also modulated by the Load RTPC, Maximum load values would allow the volume pitch to scale linearly (past a threshold), whereas lower load values would decrease the volume and pitch to offset the RPM for when the player is not accelerating.
Suspension impacts
In Wwise the setup for the suspension impacts was a simple switch container, controlled by an RTPC for easy assignment in the engine. To create a really dynamic and realistic sound, the key was creating sufficient levels of intensity, as well as enough variations for each intensity level. I ended up going for 6 “Severity” levels and 6 variations for each, totalling 36 individual sounds. This paired with pitch and volume randomisation provide plenty of range and variation for the system.
Unfortunately, Chaos wheel components did not expose any kind of hit events, meaning I would have to manually determine when impacts occur and approximate their severity. I decided the easiest solution with the variables I had access to, was to track the “airborne” status of each wheel, as well as the duration of time each wheel remind airborne, creating a “severity” value on the assumption that a longer falling duration would result a heavier impact (this however does not account for things like rotational velocity).
This implementation, paired with the wide range of audio clips, resulted in a simple, yet highly dynamic suspension system. The blueprint for the timer / audio posting function can be seen below:
And here are some audio examples of each severity level:
Thanks for reading, if you have any questions give me a shout!